
Here are my inspiration pumpkins (found here and here).


And here are my recreations of these lovelies! (Please excuse the poor lighting in these photos...)


I had a great time seeing inspiration turn into wonderful fall decor! What's great about these pumpkins is that they transition nicely from Halloween decor to fall decor without reading too Halloweeny. I think the neon pumpkins are so fun. They're such a different look for Halloween. And since neon is currently trendy, but not something that I think will last too long, it's a great way to embrace the trend but do it on something temporary!
Here are the supplies you'll need:

1. A bunch of pumpkins! I mixed it up between real pumpkins and fake ones from Michaels. The fake ones helped me skip a step since I bought ones that were already colored white and black.
2. Paint and of course glitter! Acrylic paint works the best and comes off clothing and surfaces relatively easily.
3. Pick glitter with a fall color palette. I like buying a set so that have many hues to choose from!
4. Glue and paint brushes. J has a whole container of Elmer's glue lying around so that's what I used. It worked like a charm so that's what I would suggest. Any paint brushes should do but you'll want a variety of sizes.
The herringbone pumpkin was super easy to create and is one of my favorites! Bonus that the pattern looks like spider webs! I used acrylic paint that has a tip on it and just free handed the herringbone pattern. If I can do it, anyone can do it. Let's just say that I have always been better at the musical "arts" than the painting arts! I did the same thing for the jack-o-not-lantern. Painting on a face is so much easier than carving! It took me only 5 minutes!
The chevron pumpkin is my absolute favorite and the one I'm most proud of since it took some skill. Here's my step by step for you!

Step 1: Tape out your chevron pattern. I first attempted a chevron pumpkin by free handing with glue. That went terribly, which is why my black pumpkin is pretty much just covered in glitter. Had to salvage it somehow! The tape process is long and meticulous. It's important to try to make the chevron peaks and valleys even. Once you've taped the top of the chevron, it's time to tape the bottom! Make sure the bottom mirrors the top to make the chevron look right.
Step 2 : Press the tape all the way against the pumpkin to create a tight seal. Use your paint brush and brush glue over the chevron. I did this in sections so the glue didn't dry before I got a chance to add the glitter. Move on to step 3 and then repeat 2 and 3 until the whole stripe is covered.
Step 3. Hold your pumpkin over a large bowl. Sprinkle glitter thickly over the glue section. Make sure all of the glue is covered. Then shake the pumpkin over the bowl to remove the excess glitter.
And voila!

I'm so happy with how these turned out!
The neon pumpkins were fairly easy to recreate. Nothing a little grey and neon yellow paint can't help! Something to note- I would suggest choosing a different neon color (perhaps pink like the inspiration pictures!). Yellow is very hard to cover with and took many coats to get an opaque look. For the solid neon pumpkin, all I did was spray paint the stem gold and coated the pumpkin in neon yellow paint. For an ombre effect on pumpkin #2 I lightly used my brush to make a faded uneven line, making the paint more concentrated the further away from the middle I got. The grey chalky pumpkin just got a coat of grey paint, done lightly so that a bit of the pumpkin still shows through. Now, the triangle pumpkin took a bit more work. Like the chevron pumpkin, tape was required to pull this look off.
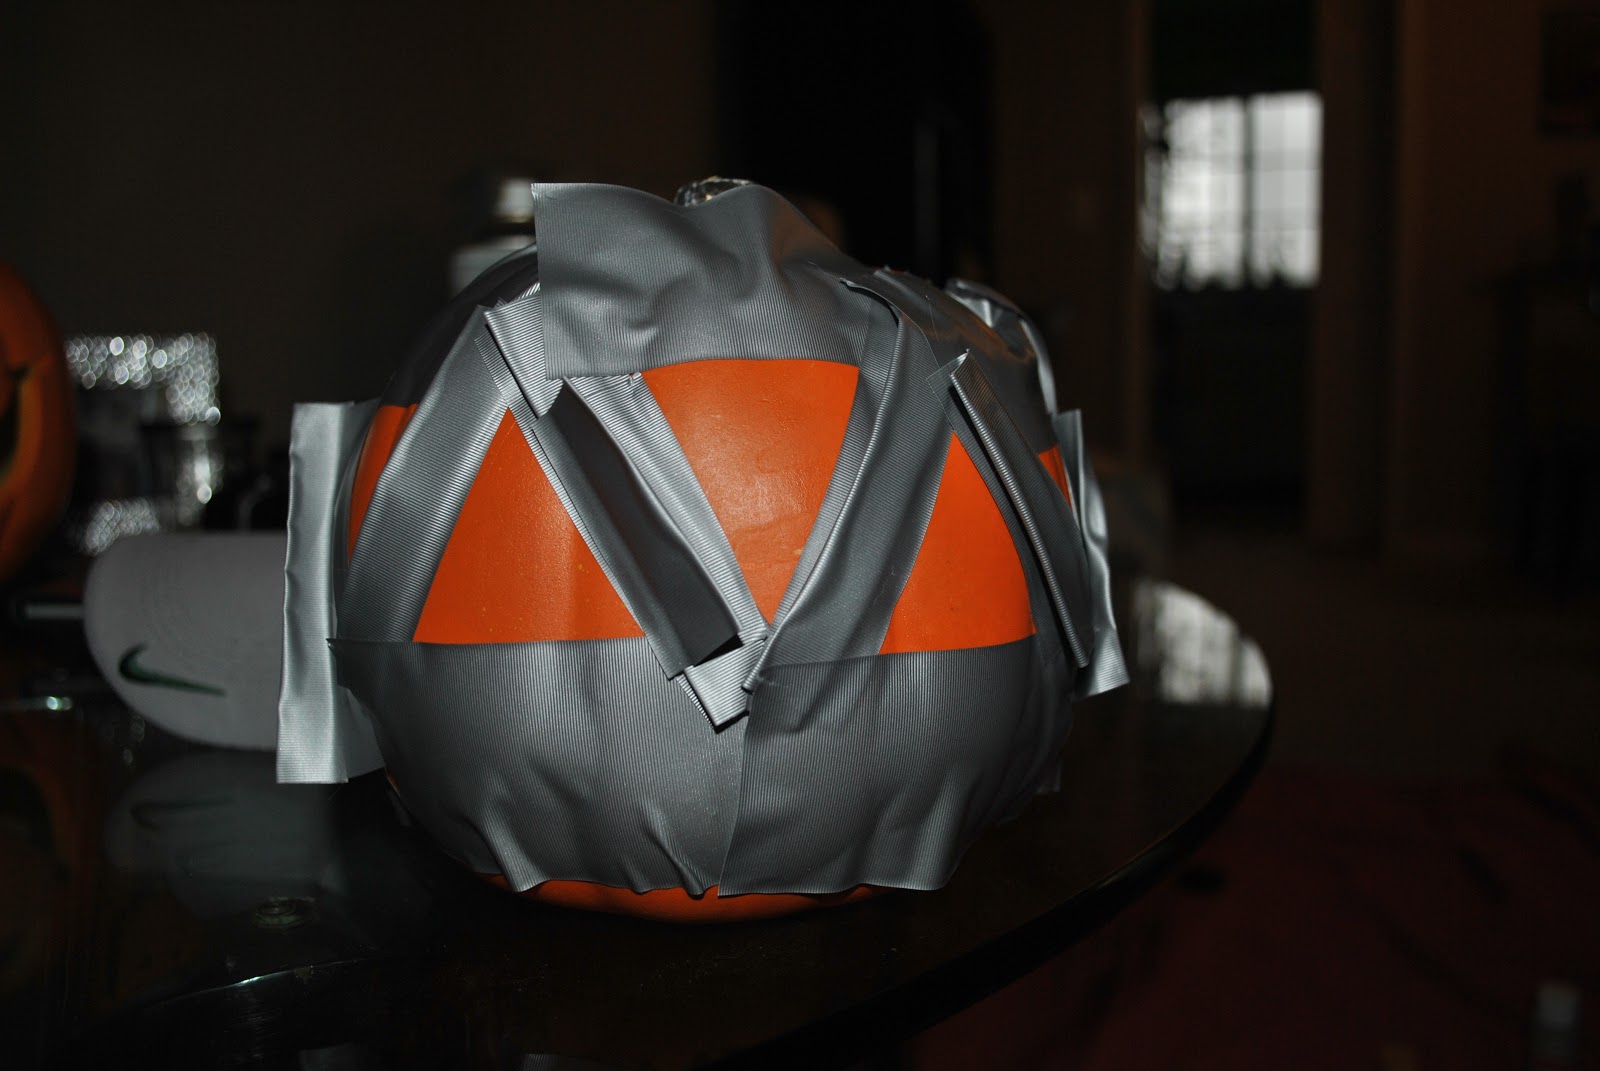
This was quite a challenge! Once the pattern is taped out, paint over the shapes. A few coats will probably be needed.

Happy Halloween!!
<3
No comments:
Post a Comment